


Why DOI in Mautic Is Harder Than It Looks
Double opt-in sounds straightforward: a contact submits a form, receives a confirmation email, clicks the link, and is marked as confirmed. In practice, Mautic makes this deceptively difficult to get right.
The first challenge is speed. The confirmation email needs to go out immediately after form submission. Any delay increases the chance the contact loses interest or the email lands in spam while they're still paying attention. Mautic's standard campaign-based approach depends on the contact entering a campaign and the campaign update job picking them up, which often takes too long for a reliable DOI process.
The second challenge is reliability. The confirmation link click needs to be tracked and acted on correctly. If the contact hasn't fully entered the campaign yet when they click, Mautic may miss the event entirely and the contact ends up in a broken state: confirmed in reality, unconfirmed in the system.
The third challenge is post-confirmation timing. Any actions that should only fire after confirmation (e.g. adding to a segment, triggering a welcome sequence, syncing to a CRM) are just as vulnerable to the same race conditions. Building these reliably in a standard Mautic campaign requires careful workarounds.
There have been community plugins addressing parts of this problem in the past, but most are no longer maintained and lack the flexibility modern use cases require.
What Our Plugin Does
The Email Verification and DOI plugin by Leuchtfeuer replaces Mautic's campaign-based DOI approach with a dedicated, form-level workflow that is faster, more reliable, and easier to configure.
When a contact submits a form with DOI enabled, the plugin sends the verification email immediately on form submission. The verification link in that email is generated using an HMAC-based hash, which makes it both unique and tamper-proof.
The plugin tracks the link click independently of Mautic campaigns. This means it does not matter whether the contact has fully entered a campaign or not at the time they click: the confirmation is caught and saved correctly in a separate database table.
Post-confirmation actions are configured directly in the form as a separate action set. These actions only fire after successful verification, with no timing issues. The „regular“ form actions are still executed immediately after form submit.
The plugin also covers the edge cases that usually require manual workarounds: configurable link expiration, optional follow-up reminder emails for contacts who have not confirmed yet, and per-form conditions for skipping the DOI step entirely (for example, for contacts who are already verified).
Key Features
- Immediate send: The verification email goes out synchronously on form submission, not via cron-triggered campaign processing.
- HMAC-secured links: Each verification link is uniquely generated and cryptographically signed, preventing replay or manipulation.
- Split form actions: The form distinguishes between actions that run immediately on submission and actions that only run after confirmation. Both are configured in the same form, on separate tabs.
- Any email as DOI email: There is no special "DOI email type" — any Mautic email containing the
{doi_link}token can be used. - Follow-up reminders: An optional follow-up email can be configured per form, sent automatically after a configurable wait time (default: 24 hours) if the contact has not yet confirmed.
- Link expiration: Verification links expire after a configurable timeout (default: 48 hours). Expired submissions can optionally be deleted automatically.
- Skip conditions: Per-form rules allow the DOI step to be bypassed for contacts that meet certain criteria, such as already-verified contacts or specific segment members.
- Configurable redirects: Success and error pages after verification are set per form, giving full control over the post-confirmation experience.
Basic Setup
1. Create the verification email
Create a regular Mautic email and place the {doi_link} token somewhere in the body. This is the link the contact will click to confirm their address. Translated versions of the chosen email will be taken into consideration if they match the contact’s preferred locale.
2. Enable DOI on the form
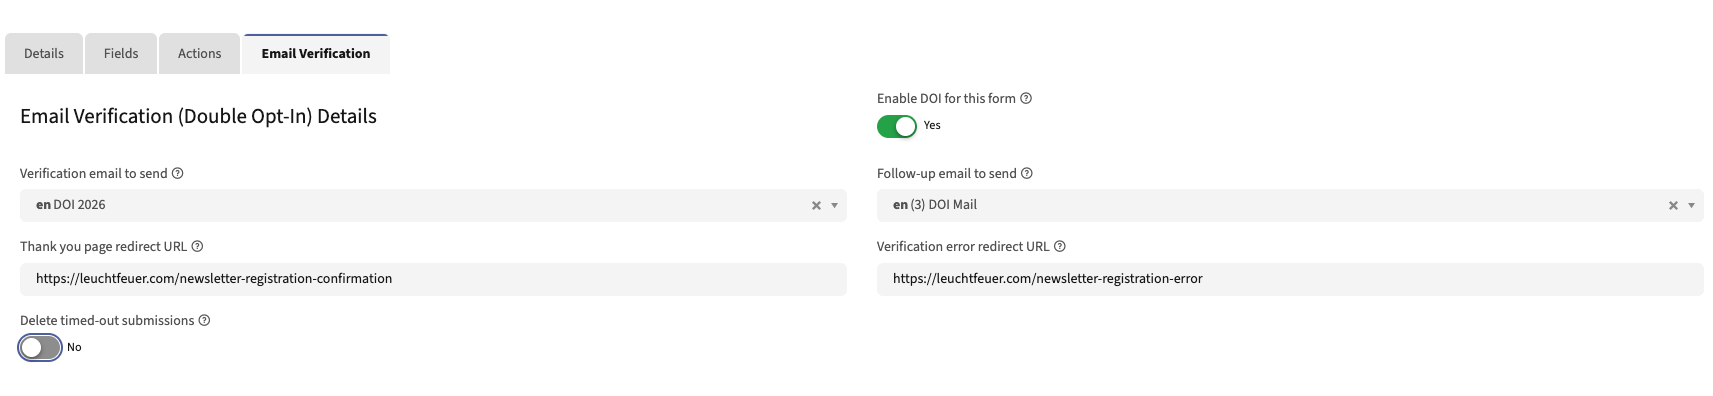
Open your form in Mautic and go to the new Email Verification tab.
- Enable the DOI switch for this form
- Select the verification email you created in step 1
- Optionally select a follow-up reminder email, which is sent automatically to contacts who have not confirmed after a configured wait time
- Optionally set redirect URLs for the confirmation success page and error page (if left empty, the plugin uses its defaults)
3. Configure skip conditions
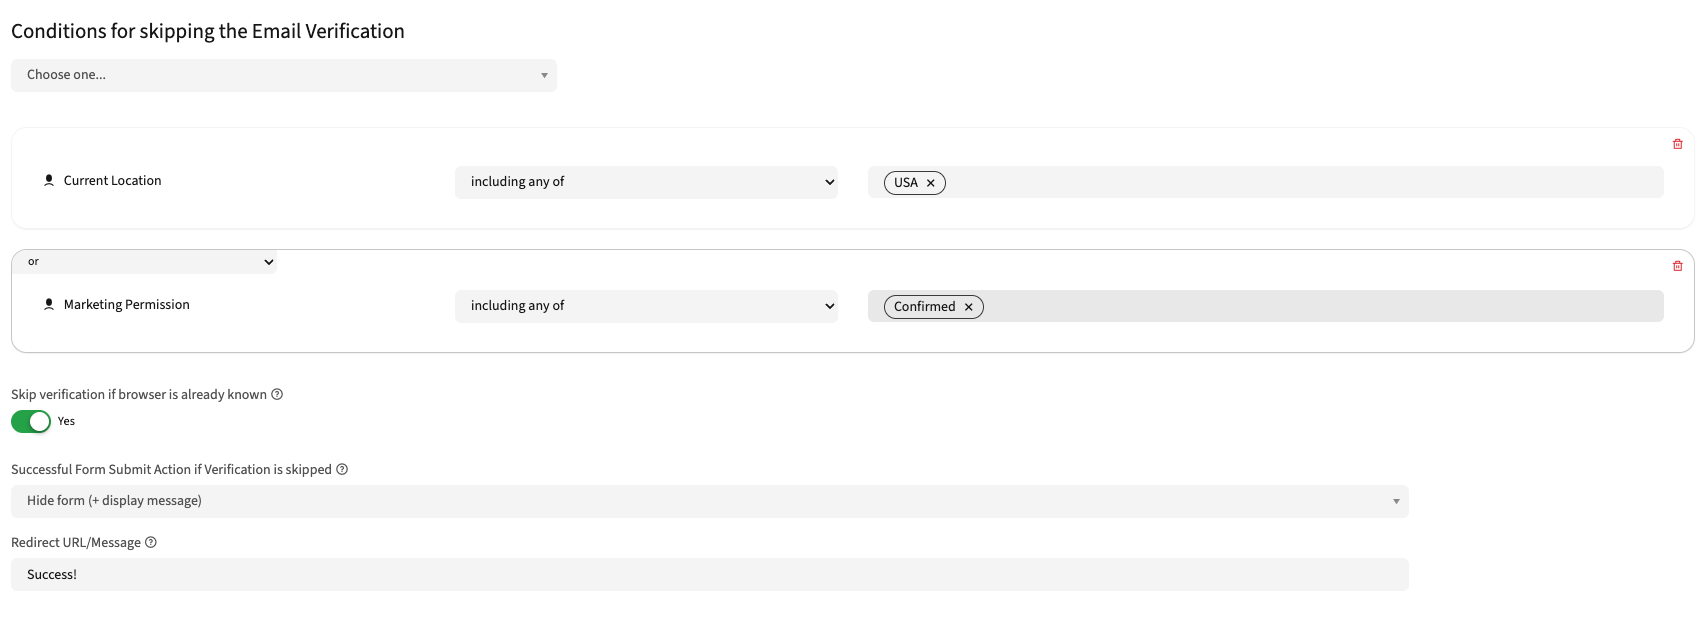
Skip conditions let you bypass DOI for contacts that meet certain criteria. A common example is skipping for contacts whose country is set to US, where double opt-in is not legally required. You can also enable the skip when browser is known option, which skips verification for returning contacts whose browser has already been identified.
What makes sense here depends on your business rules. The plugin gives you the flexibility to define it per form.
4. Set post-confirmation actions
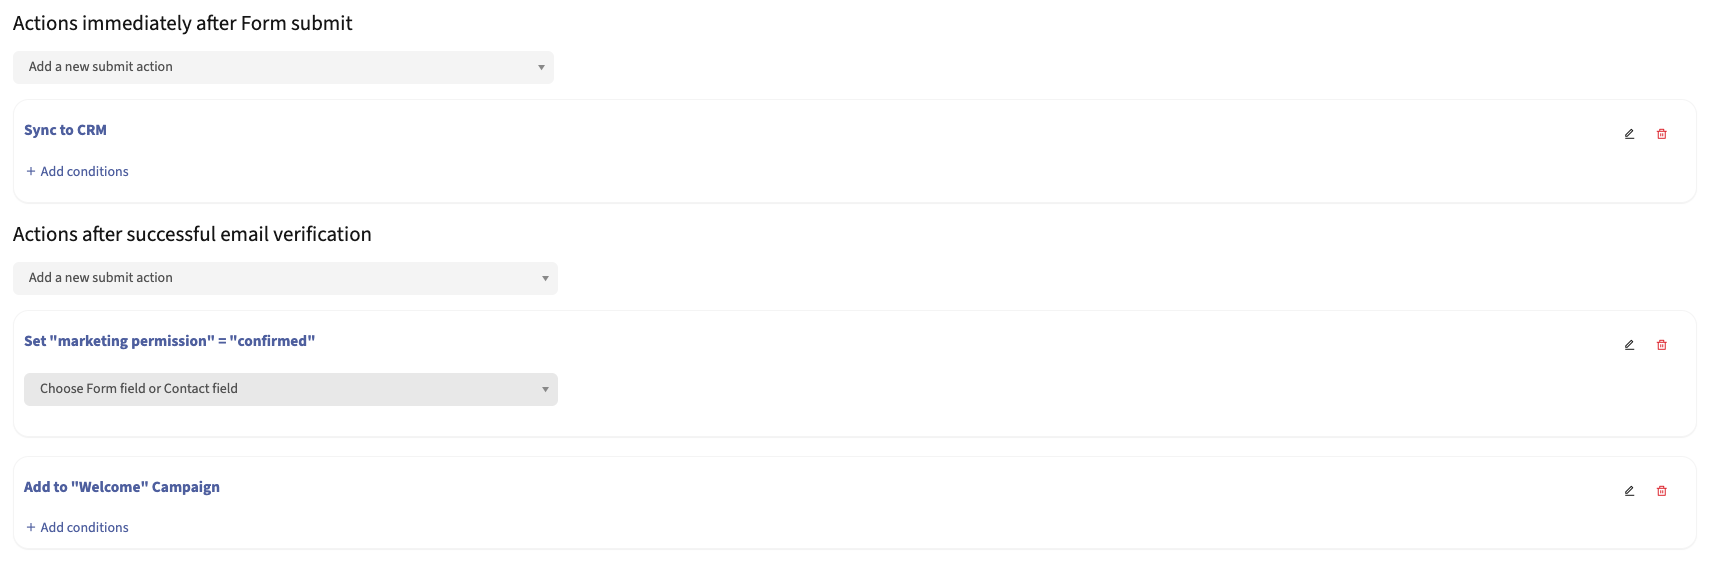
Go to the Actions tab. This is where you define what should happen after a contact successfully verifies their email.
For example, it is good practice to write a timestamp to a contact field to make the value usable in further workflows. Depending on your use case, you might also set marketing opt-in flags, update other contact fields, or trigger further workflows.
These actions only fire after successful verification, not on form submission.
Known Limitations and Troubleshooting
Campaign forms start immediately
If you use a campaign form, Mautic will add the contact to the campaign immediately on submission, it will not wait for email verification to complete. For forms where this matters, keep in mind to build in an extra check into your campaign.
Verification history entries (introduced in plugin version 5.2.0)
Prior to plugin version 5.2.0, successful and unsuccessful verification attempts were not displayed in the contact's activity history.
For installation instructions, requirements, and cron job setup, refer to the plugin README on GitHub. Also, if you have any questions, don’t hesitate to reach out to mautic@leuchtfeuer.com.